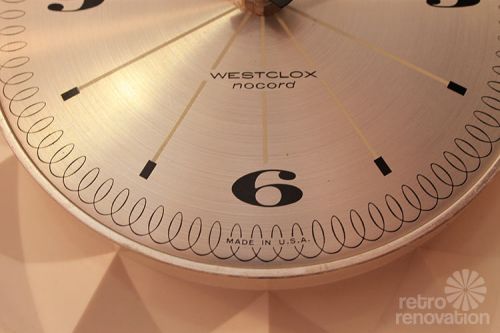
How to Replace a Quartz Clock Movement and Hands Tutorial
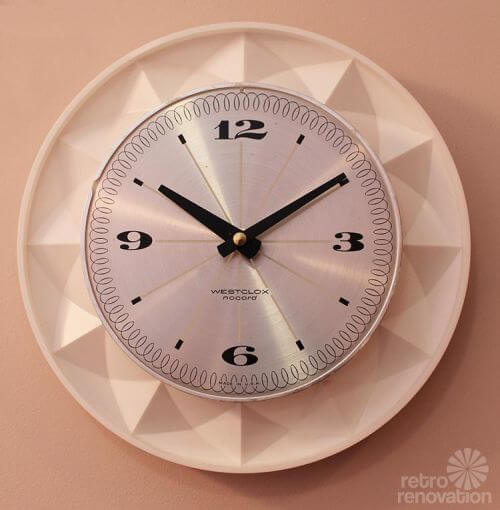
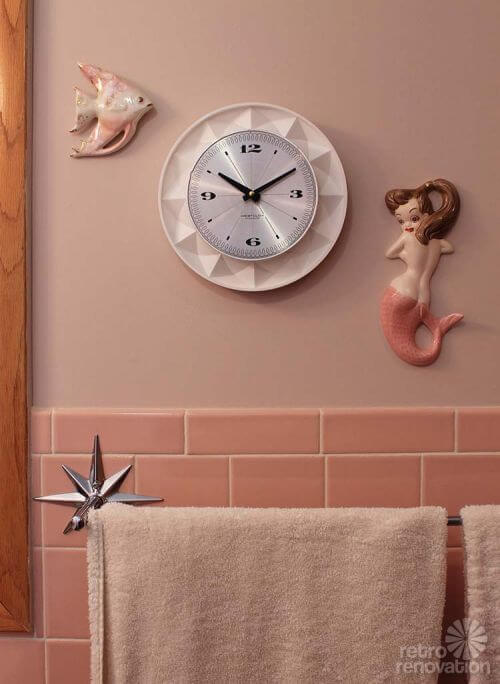
I bought the clock because I liked the interesting geometric white plastic edges and the fun retro swirly and starburst designs on the face of the clock. (Oops, I do not have a photo of the "before" clock.) The clock was inexpensive, and the seller said that it "worked great", which made me think I'd only need to slap it on the wall and call it a job well done. Once I received the clock, though, I verified that it did work — though unfortunately it gained about five minutes every day, which add up fast over the course of a week.
Determined to replace the movement, I started doing research and found that it should be a relatively easy task assuming:
- You can easily remove the old movement…
- And, you can determine exactly which replacement movement is needed.
Unfortunately for me, both of these tasks proved difficult. As an added challenge, I wanted to reuse the original George Nelson-style clock hands — which I knew in advance might not be possible — or, to find replacement hands as close as possible to the originals.
Step 1 — Carefully remove the old hands and movement
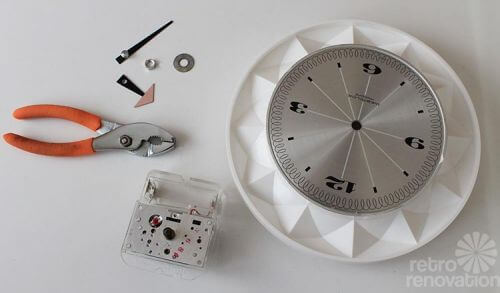
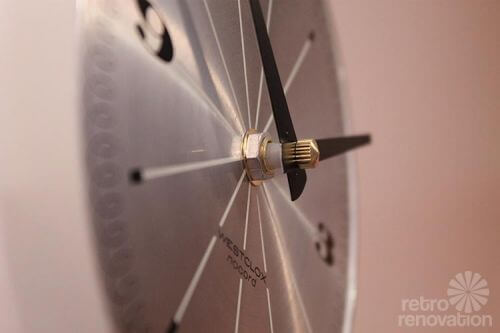
After several attempts using this method, the clock finally let go of the cap nut, which was (interestingly) connected to the minute hand. From that point the hour hand popped off easily. Then, carefully using the pliers, I was able to unscrew the hex nut from the clock face, which freed the movement from the clock body.
Step 2 — Measure the old clock movement and find a suitable replacement
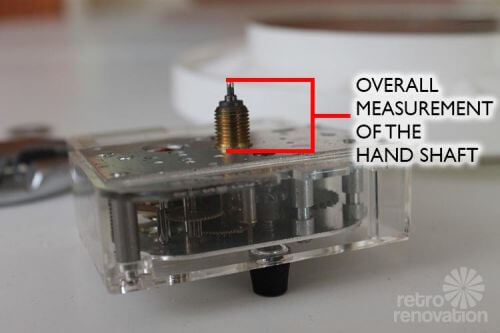

Once again, what should have been an easy task did not go according to plan. On my first attempt, I measured my hand shaft and ordered a Quartex push-on movement with hex nut with the same length hand shaft as my original movement. Unfortunately, the movement wouldn't work in my clock. Why? First, the threaded portion of the hand shaft was not as tall as the threaded portion on the original movement.
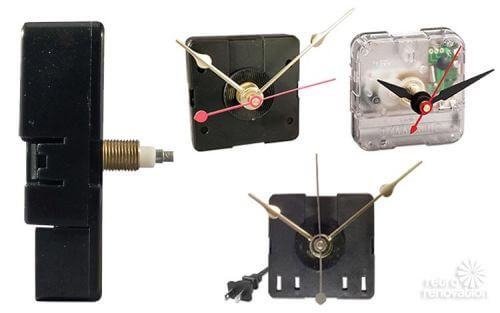
Thinking I'd give it one more shot before throwing in the towel, I ordered a Q-80 clock movement with a slightly longer hand shaft. It was apparent to me at this point that I would not be able to use the original clock hands since the holes in the original hands were much smaller than the diameter of the new movement shaft. Since Klockit offers a free set of hands with each movement they sell, I tried to find the hands that most closely resembled the originals.
Step 3 — Reassemble your clock
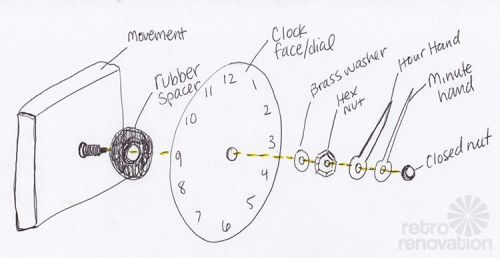
- Use rubber spacer gasket between movement and dial to hold movement in position without having to over tighten it.
- Place a brass washer between the dial and the hex nut to prevent the nut from marring the dial as you tighten it down.
- Tighten the nut down only enough to hold the movement firmly in position. If the movement can rotate in your clock case, timekeeping will be affected.
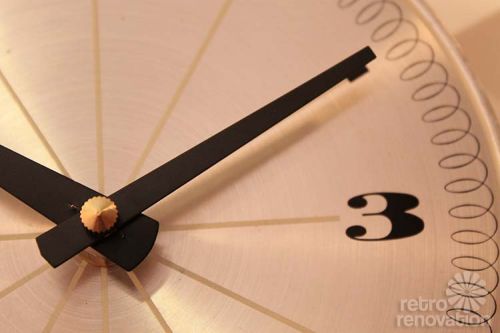
- Temporarily place the minute hand over the "I" shaft as illustrated and rotate the hand clock-wise until it is pointing at the "12" on the dial. Lift the hand off.
- Choose any number on your dial to align the hour hand with. Very carefully press the hour hand straight down onto the tapered, friction-fit hour shaft until the hand is firmly in place. In the event that the hour hand is not perfectly aligned with the number on the dial that you have chosen, DO NOT try to rotate the hand hub on the tapered shaft. Lift the hand straight off. Realign the tip of the hand with the number and press the hand on correctly.
- When you have the hour hand mounted, carefully remount the minute hand at 12:00. While holding the tip of the minute hand between your thumb and forefinger at the 12:00 position, thread on the closed nut.
What I learned — helpful tips:
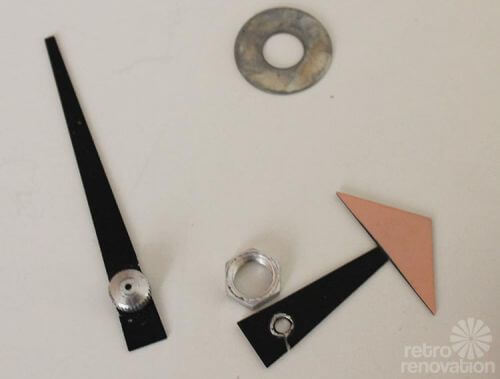
- As much as you will want to keep the clock's original hands, it may not be possible. I was lucky to find a new minute hand that was nearly identical to the original minute hand. It may be possible for me to somehow make the hole in the clock's original hour hand large enough to work with the new hand shaft on the movement, but I have not tried drilling or punching the hole to attempt to make it larger. Anyone with clock fixing experience want to verify if this is possible?
- All of the nuts and washers on my original clock were silver. It seems that new nuts and washers only come in brass. I was able to use the original hex nut, but for the closed nut that holds the hands in place, I could not reuse the original. The brass nut doesn't bother me, but it could easily be spray painted silver to match.
- The hardest part of the whole project was trying to determine exactly which replacement movement would work with my clock. The movements were not expensive ($3-$5), but I did have to order two different movements before finding one that worked with my clock. It may be worth ordering two movements with slightly different hand shaft measurements to ensure that you get a movement that will work with your clock on the first try to avoid extra shipping charges.
- If you have a clock repair store near you, I would take the old clock and movement in to the store and ask for professional help in selecting a replacement movement. Figuring that part out myself was a headache!

How to Replace a Quartz Clock Movement and Hands Tutorial
Source: https://retrorenovation.com/2014/02/19/replace-movement-hands-vintage-electric-clock/
0 Response to "How to Replace a Quartz Clock Movement and Hands Tutorial"
Post a Comment